The computer is filling up, and you need more space? A second hard drive can be installed very quickly – even by laypeople!
Having a second hard drive on your computer has several advantages, but most importantly, it gives you more space. The installation of this hard drive varies depending on the type of computer. We will show you how to install the hard drive and configure it directly in Windows 10.
Table of Contents
Space Is Running Out
Stationary computers, i.e., the classic tower, usually come into play early on with two hard drives: a fast solid-state drive for the operating system and programs and a classic hard drive (HDD) with many hard drives. Storage space. There are many ways to expand storage space: external hard drives, network-attached storage (NAS), and the cloud. But nothing is as convenient as another internal hard drive.
It’s pretty easy to install and set up, but plug-and-play doesn’t work. But don’t be afraid to unscrew the computer: on the one hand, devices to designs for that; on the other hand, it is hardly possible to go wrong. We’ll show you how to install a hard drive in a tower first; then, we’ll show you how to install a laptop. The installation follows it under Windows, which is always the same.
Installation
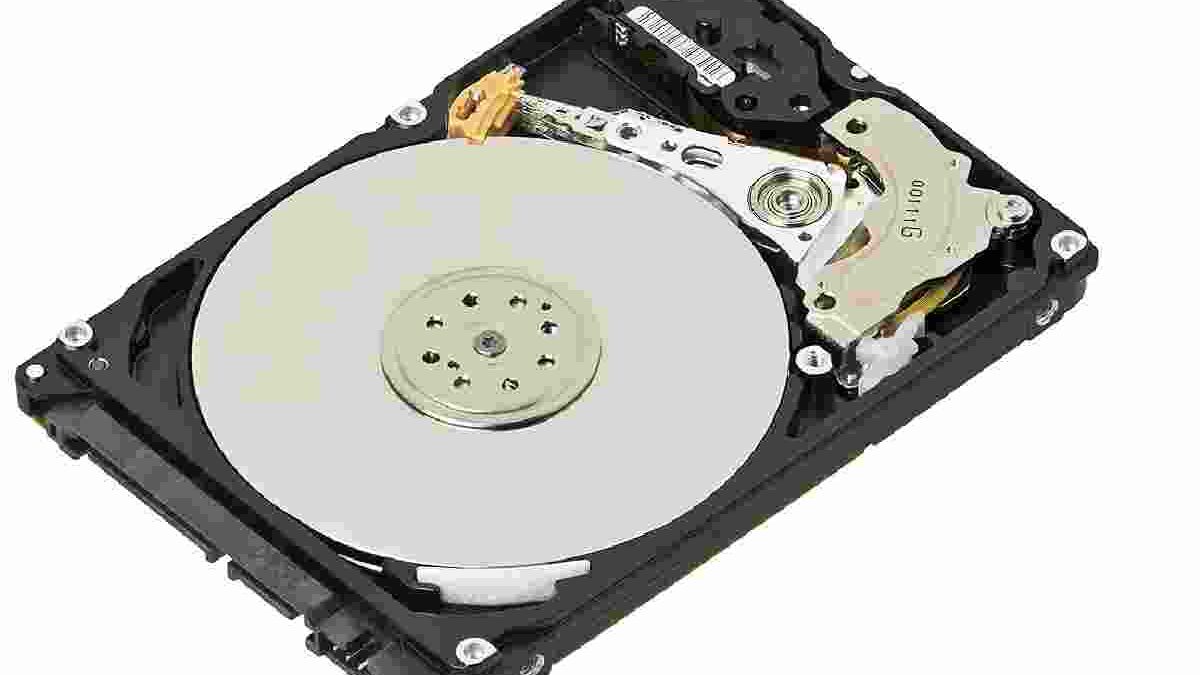
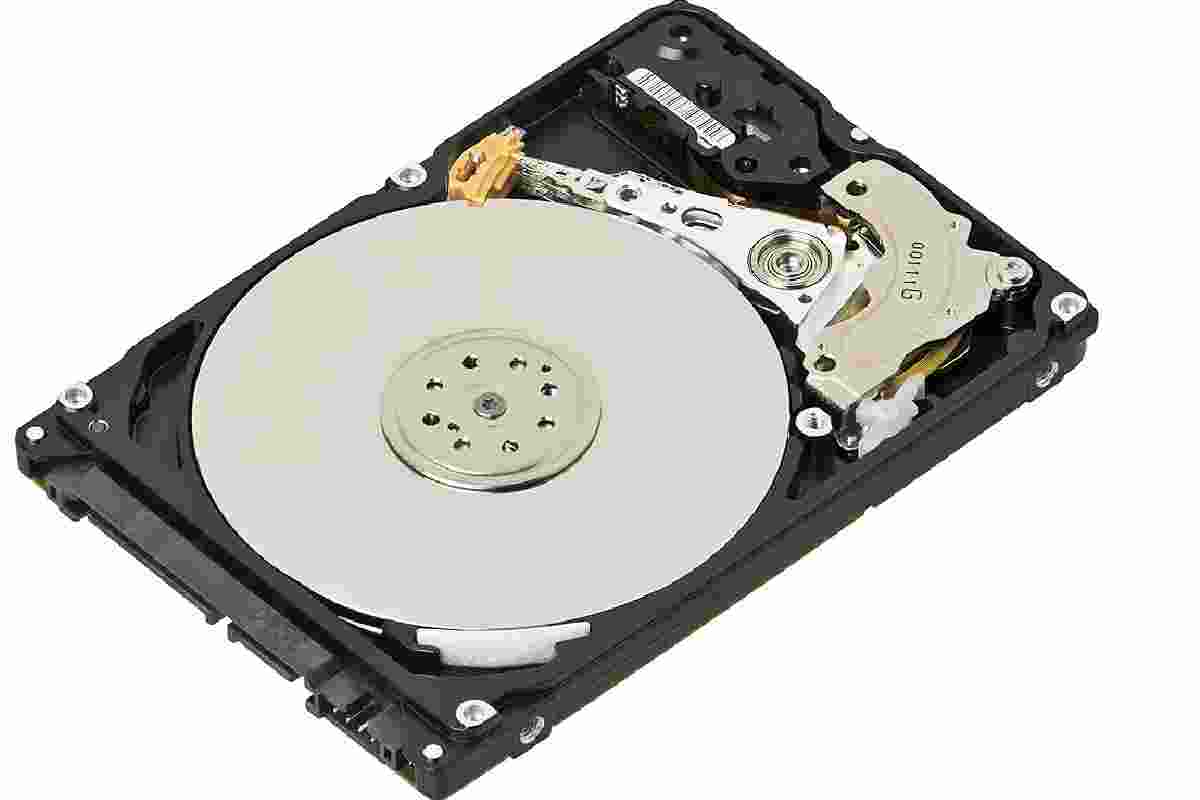
Fortunately, PC cases to standardize, so you can use any 3.5-inch SATA hard drive. The Serial Advanced Technology Attachment (SATA) connection is the same for 3.5-inch hard drives and small 2.5-inch hard drives. Often you will find mounting material for complex purposes in the housing itself. Otherwise, a couple of screws to includes. Emergency tip: If nothing else works, you can remove two of the four screws from another hard drive or DVD drive and use them on the new hard drive. However, this can lead to long-term vibrations to correct promptly.
Unscrew the housing and remove the cover. First, you should find the correct connector on the motherboard. Just look at the existing hard drive cabling – it ends at a SATA connector, more precisely SATA III (also called 6G). If you take a closer look, you will likely find at least four SATA ports. Some of these should only be SATA-II (3G) connections. SATA III is much faster than its predecessor SATA II. And that is why the system hard drive of your computer, regardless of whether it is a hard drive or SSD, is connected to the SATA III. You can find the appropriate labels on the motherboard itself.
It would help if you prefer a SATA III connection for data-only hard drives that don’t have hundreds of gigabytes of data written to every day, but a SATA II connection isn’t a problem either. Already plug in the SATA cable.
Now install the hard drive in the slot. Different approaches depend on the manufacturer of the enclosure. Sometimes, you can find brackets that don’t require tools or screws with better cases. Sometimes hard drives have to be screwed onto small sleds, which fit under the 3.5-inch frame. By default, the hard disks to screws directly.
To counter heat development, it is best to leave a space between the existing hard drive and the new one. The plate should also install other components (graphics card, etc.) that can always replace, if possible. Tighten the screws securely, at least on hard drives, so that the vibrations do not go away later. Speaking of which: if a slow computer is essential to you, you can, of course, also use small rubber washers between the hard drive, screw, and case to ensure more peace. Such decoupling rarely occurs in the packages themselves.
Install The Hard Drive In The Laptop
There are two options for laptops: If you are (very) lucky, you will get a slot for a separate hard drive – but that can usually be ruled out. It is much more likely that the DVD drive to exchange for a so-called caddy, i.e., a 2.5-inch rigid drive carrier in the form of a DVD drive. Such media retails for around $ 10 and is suitable for any device with an optical drive in a slot.
First of all, the screws on the optical drive have to loos: There are usually two screws directly on the edge of the housing and often a third screw where the bay ends. There is a tendency that you can now remove the reader by gently shaking and pulling.
If that doesn’t work, you’ll have to more or less remove the plastic flap – underneath; There are many starting points for a small pair of pliers. The assembly of the caddy is then limited to tightening the appropriate screws.
Configure The Hard Drive In Windows
The part in Windows is as follows: The hard drive can be automatically recognized and (if desired) formatted and integrated into the system. If so, great, you’re done. Typically, however, you should first briefly configure the hard drives; H. Specify (at least) a partition, file system, and drive letter. Here are some more tips on partitioning hard drives. Open the hard drive settings via “Control Panel / Administrative Tools / Computer Management / Disk Management”. At the top, you will find a list of already available drives, and at the bottom, all connected devices. Your new it will be labeled as a sequentially numbered Disk, and to its right, you will see the label Unallocated. Open the context menu for the entry and select” New Simple Volume. ”
You can click on the following wizard – there are two exciting steps to change: on the one hand, you can change the it letter to include a backup it as “B: \.”
In the next step, remember to name it – “Volume” by default is not very useful. You also determine the file system. The standard here is NTFSset, and it can remain so. Access is also not a problem if you run Linux in parallel on the computer or want to boot from a live CD. And with this, you can also complete the wizard. Formatting takes a few seconds; then, you will find the new hard drive “B: \” in Windows Explorer.
Tip: If you are not the craft type, there is a massive potential for frustration! What if the hard drives is faulty – and everything to dismantle (screwing hard drives into the case can be tricky with small/inexpensive variants.) Treat yourself to a USB SATA cable: You can easily connect hard drives internally via USB for a few dollars and only start working after doing a test. In general, these cables are helpful: if the laptop should fall and tip over, they are the fastest way to recover data from the hard drive. Adapters are also ideal for using new hard drives as external backup hard drives.